Page 1 of 3
Relicaster build
Posted: Sun May 31, 2015 12:32 am
by itchyfingers
I’ve always had GAS for a sweet Custom Shop Telecaster relic. I know relics are generally frowned upon, and I can kinda agree to some extent. I feel like heavy relics are usually way overdone, and the light relics are not done enough. If I do it myself and don’t F it up, should be just what I am hoping to add to the stable. I certainly don’t have the coin for a legit 50’s Fender, and after months of research, I’m thinking I don’t really have the coin to splurge on a Custom Shop either!
So I’ve decided to make my own. Its going to be something that looks vintage, but has some modern amenities that would make it a true player for gigs. In the interest of simplifying the process, I’ve decided to build an Esquire. I’ve built a couple partscasters in the past, and usually do my own setups on my guitars, so I’m hoping this will come together nicely.
I’m also trying to keep this relatively inexpensive. I made a table of all the parts I’d need and priced out each piece both at the cheapest I could find it, and a price I’d spend if money were no object. The project could span anywhere from $500 to $1700. I figured I would get top quality parts where it’s critical to the tone: wood and electronics. Then I could cobble together some parts I already have, or get good deals on non-crucial parts from ebay and Reverb. In researching parts and costs, I have realized that people are making a killing selling “aged” or “reliced” parts. Like literally double and sometimes even triple the cost for some parts – just to look old! So after watching about 100 youtube videos that range from legit artisans to douchebags dragging guitars down the road behind their monster trucks, I think I have all the knowledge I need to proceed and succeed!
Re: Relicaster build
Posted: Sun May 31, 2015 12:41 am
by itchyfingers
OK, so here is everything all laid out on my side bench.
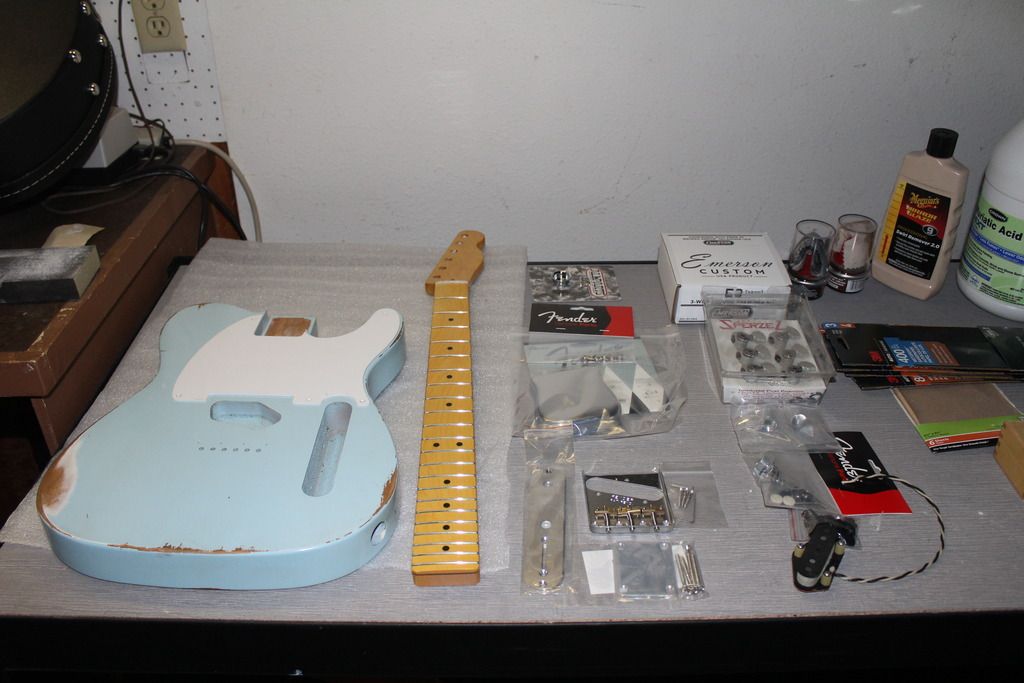
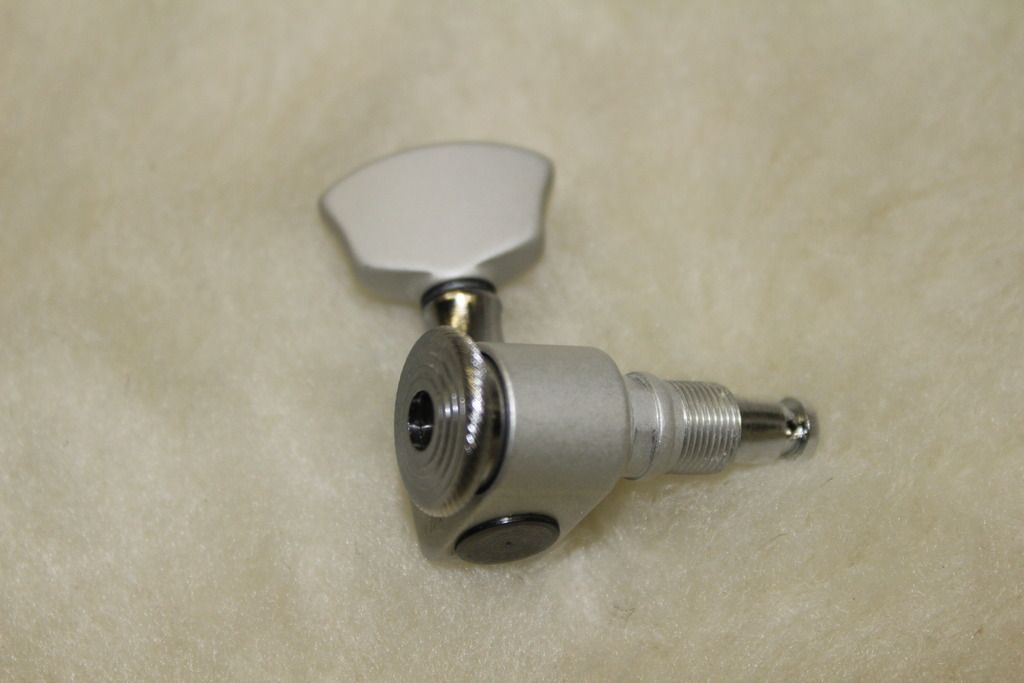
I went with genuine Fender parts for the straplocks, bridge, ashtray, and ferrules – these ended up being sort of middle of the road cost-wise. The jack is Allparts, the control plate came from China, and the neck plate is a custom engraved jobber. I obtained this set of Sperzel locking tuners in a pedal trade years ago, but they’ve never been a direct fit on any of my guitars to this point. They dropped right into this headstock - I figure since this is a ground up build, might as well use them.
They aren’t vintage correct, but the need for quick string changes on stage negates that. I have been planning on a few other modern touches as well. They’re kind of a dull, brushed aluminum, so I’m not sure yet if they’ll get the same relic treatment that the metal parts will be subjected to.
Re: Relicaster build
Posted: Sun May 31, 2015 12:54 am
by itchyfingers
The big name in non-CS relicasters seems to be MJT, but the relicing is just a bit overdone for me. Found this little guy on ebay from Pinehouse Guitars. These are all shots from the listing, its much more blue, less green in real life.
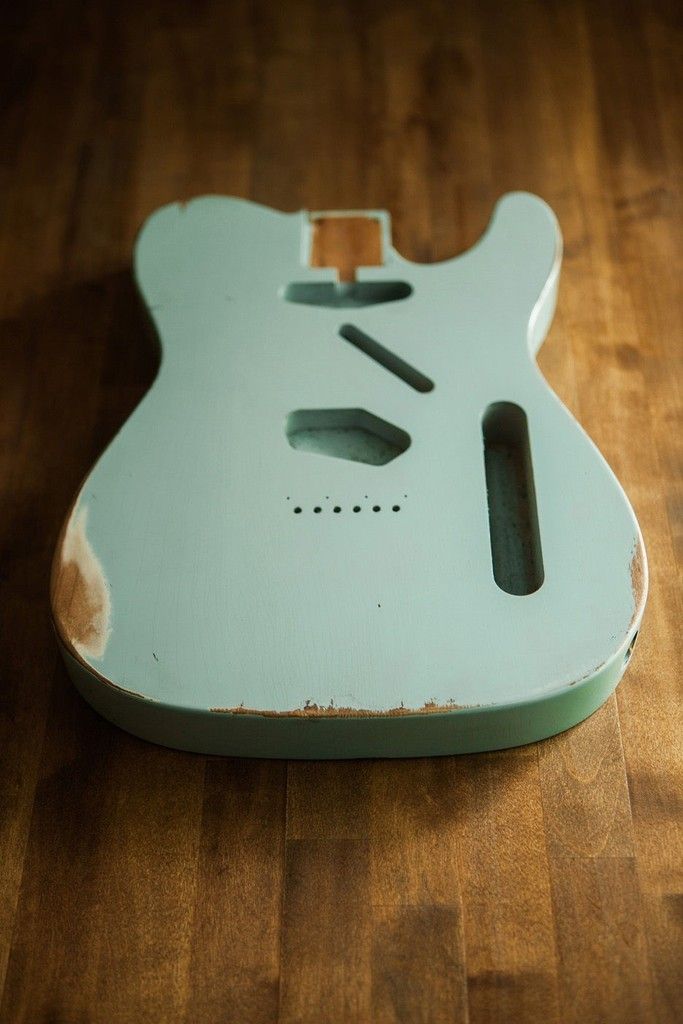
The listing lead me to the seller’s actual website. They make some awesome relics! In trading some emails with the owner I found out that if I didn’t win the auction, he would sell a reliced body for $415. Luckily I won the auction for a tad over $150, which was close to my low end estimate, so I feel like I really scored on this and saved some coin.

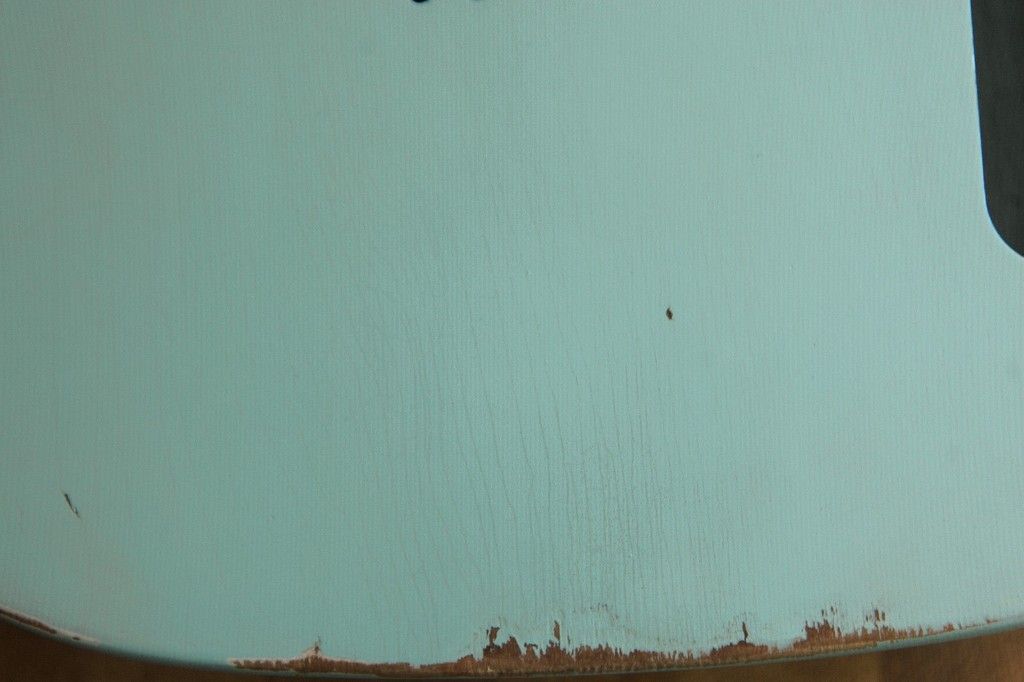
Its an alder body painted in sonic blue nitro, with what I feel is just the right amount of checking and wear. Probably would have preferred ash, but I’ve had alder on guitars and basses and it sounds fine. Upon receiving it, I am even more stoked. The checking is beautiful and there is no trace of sandpaper being used, which is usually what turns me off of “heavy” relics.
Re: Relicaster build
Posted: Sun May 31, 2015 1:09 am
by itchyfingers
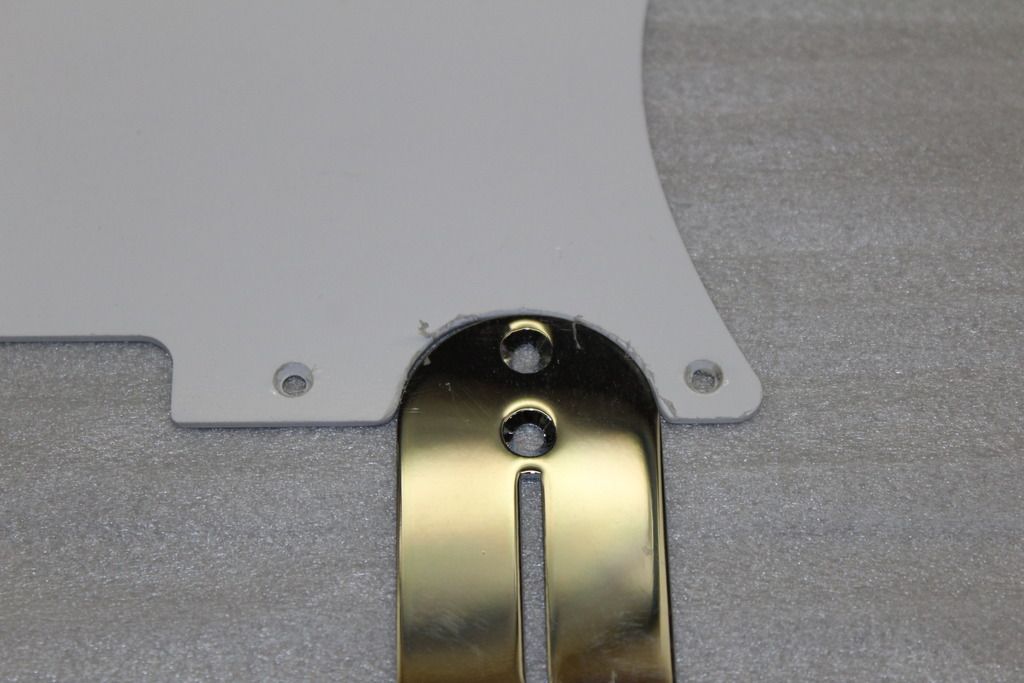
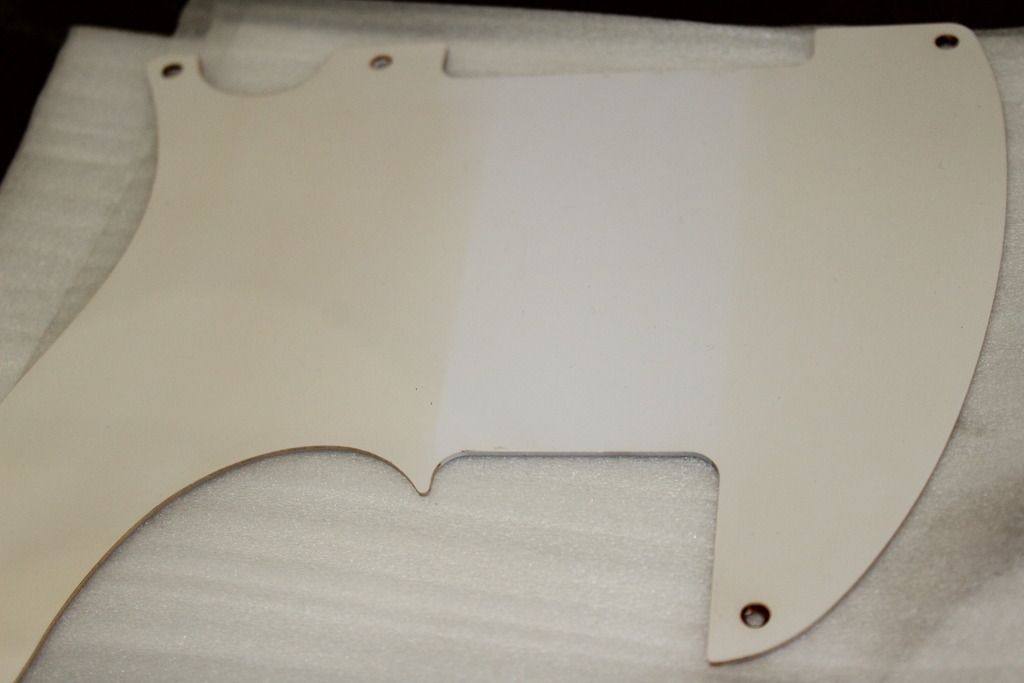
Here's the body with the pickguard and neck. Pickguard was bought direct from Stratosphere, 5 hole single ply white. The pickguard and control plate were not an exact match. Hmm, the one part I sourced from China...
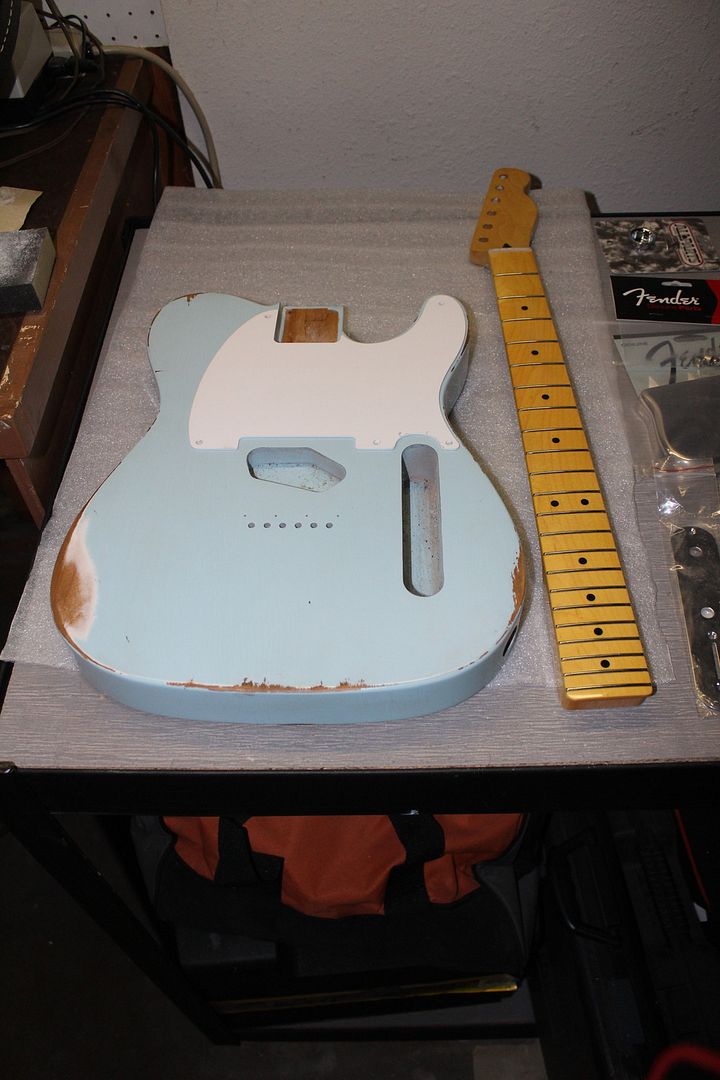
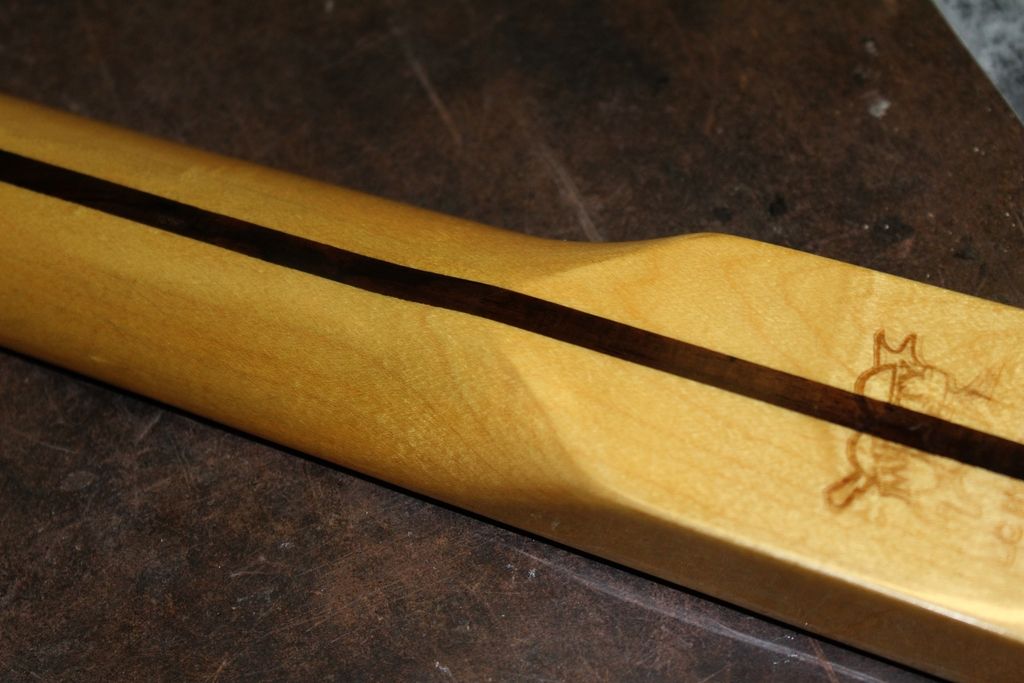
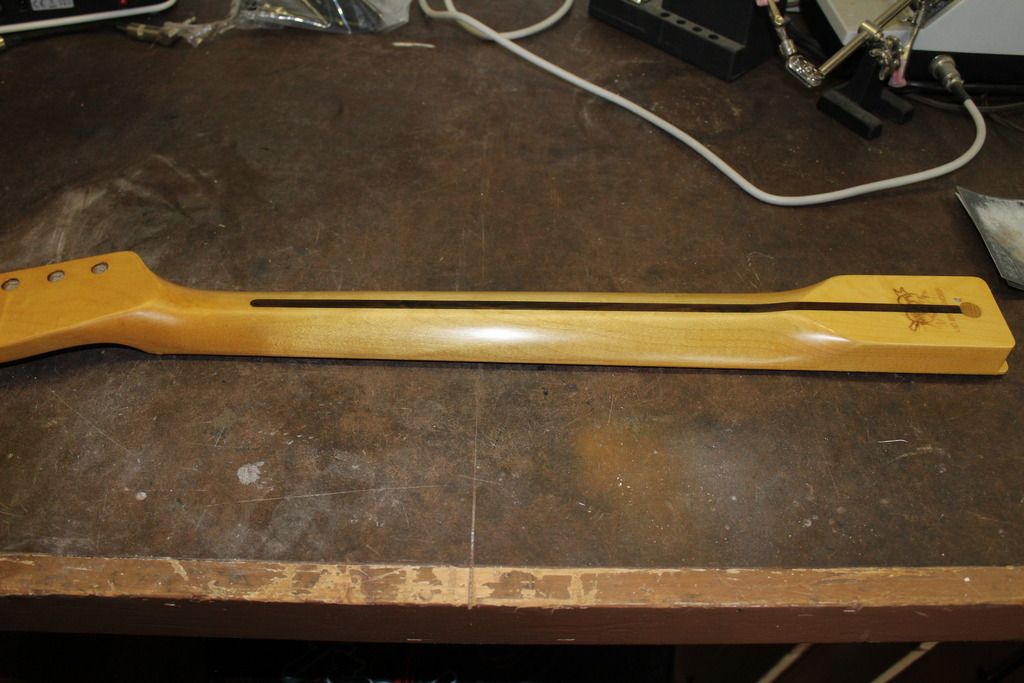
I really wanted a vintage modern neck from Warmoth, but with the options I wanted, I was looking at spending close to $400. That would be 80% of the low-end limit, so just not worth it right now. I may still go that route, depending on how this one feels; I saved enough on the body I could probably splurge elsewhere, but right now the whole guitar is coming in at under $600. Anyway, this is a Mighty Mite neck that I scored from the Stratosphere for just under $150. It’s got the vintage looking tint, but it sorta ends there. I have a vintage neck on my Strat partscaster, and the 7.5” radius is just a little too curved for me - this one is 9.5” so it should work for me. I also like the fact it has the truss rod adjustment in the headstock, so I won’t need to take the neck off several times while getting the action setup correctly. I’m definitely going to work on the back and the headstock, but I haven’t decided if I will relic the fretboard or not. We’ll see how it looks when its all put together. The neck was a tad too big for the neck pocket but some light sanding on each side, and now its a super snug fit, not going to mess with that any further.
Used the exacto knife and sandpaper to open up the pickguard a bit. Here are pretty much all the tools I'm going to need for aging.
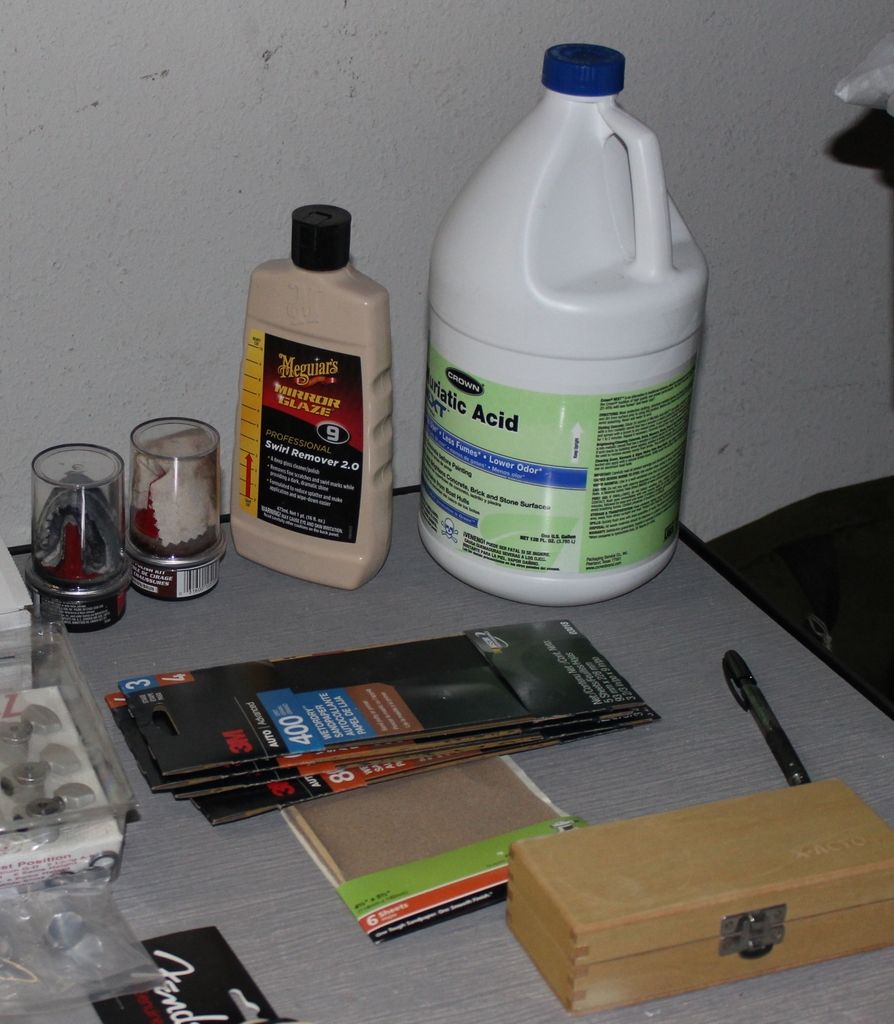
Lots of different options for relicing the metal parts. Some people use etching solution that is intended for circuit boards, but the result is usually a bit too ‘rusty’ for my taste. I’m a big fan of the James Trussart guitars, but I don’t want it to look like I need a tetanus shot after playing. I’m thinking that a little goes a long way with this process, and it’s all about minute details and having patience, or I’ll end up with something that looks like it was dragged out of a lake. I’ve decided I’ll go with muriatic acid, and rather than dumping parts into the acid, I’ll just use the fumes in short timeframes so it doesn’t go overboard.

A bit of shoe polish, both black and brown will also be used to "dirty" up some bits. Multiple grades of sandpaper, and the Xacto kit. I'll be using some nitro to seal up the relicing and the headstock waterslide as well as some car polish to take out any swirls.
Re: Relicaster build
Posted: Sun May 31, 2015 1:31 am
by itchyfingers
Here are my parts. The parts on the left are all steel, so they should respond well to the muriatic acid. The parts on the right are aluminum.

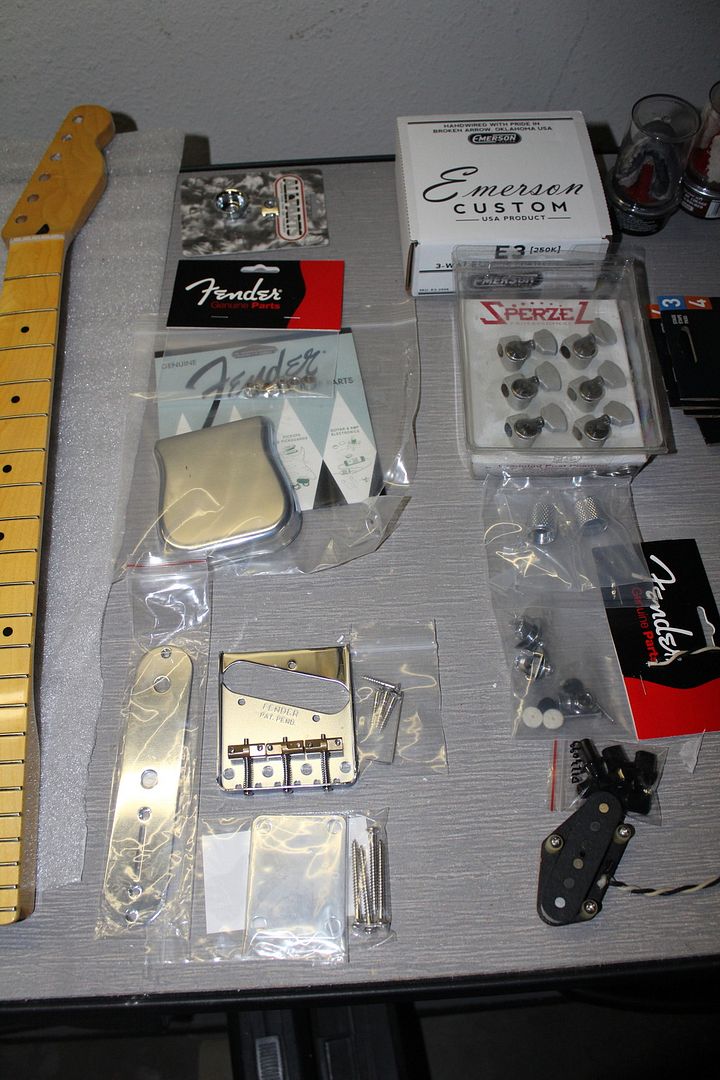
The steel parts should age fairly quickly, but the parts with chrome will take a bit more time to get through the plating. I have heard anything aluminum will get eaten right through, so that will be interesting! I'm definitely not adding anything directly to the muriatic acid.

I’m planning on 20 minute intervals in acid fumes, so I should be able to catch anything before it gets too aged, or eaten away at. I’m just looking for some discoloration and pitting.
Re: Relicaster build
Posted: Sun May 31, 2015 1:56 am
by itchyfingers
Not sure if you have heard of Emerson Custom, but somehow I made it onto their mailing list about a year ago and with the quality of components and beautiful work they do, I have just been looking for an excuse to pick up one of their wiring harnesses. Turns out they were in the midst of designing an Esquire Pre-Wired kit, and I may have been the first or second guy to get one, the timing was so perfect! The owner, Mitch was a pleasure to speak with.
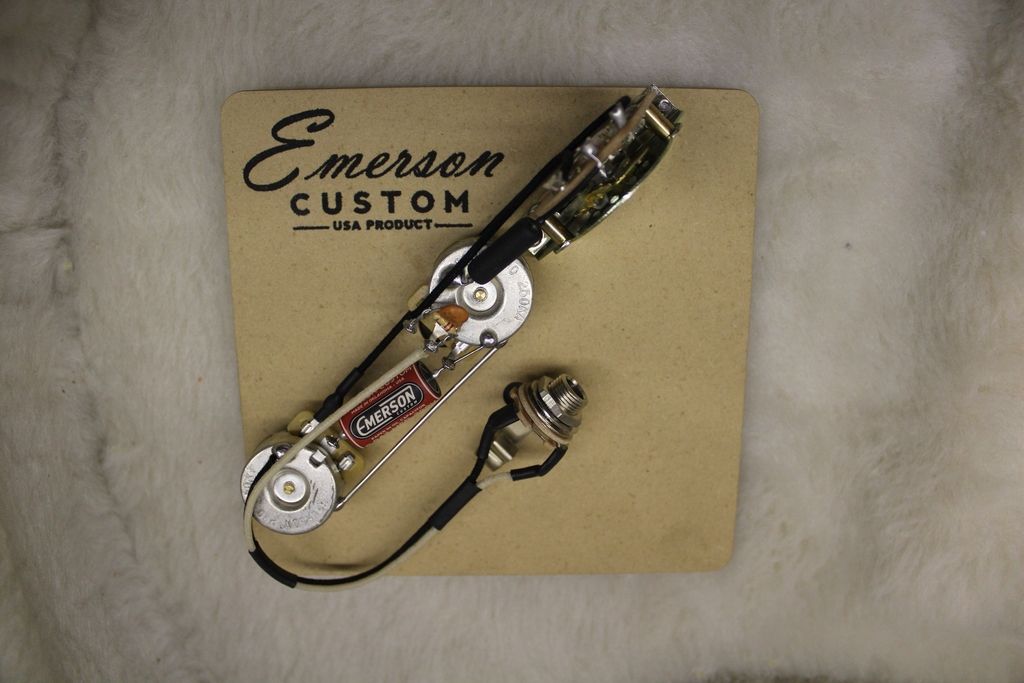
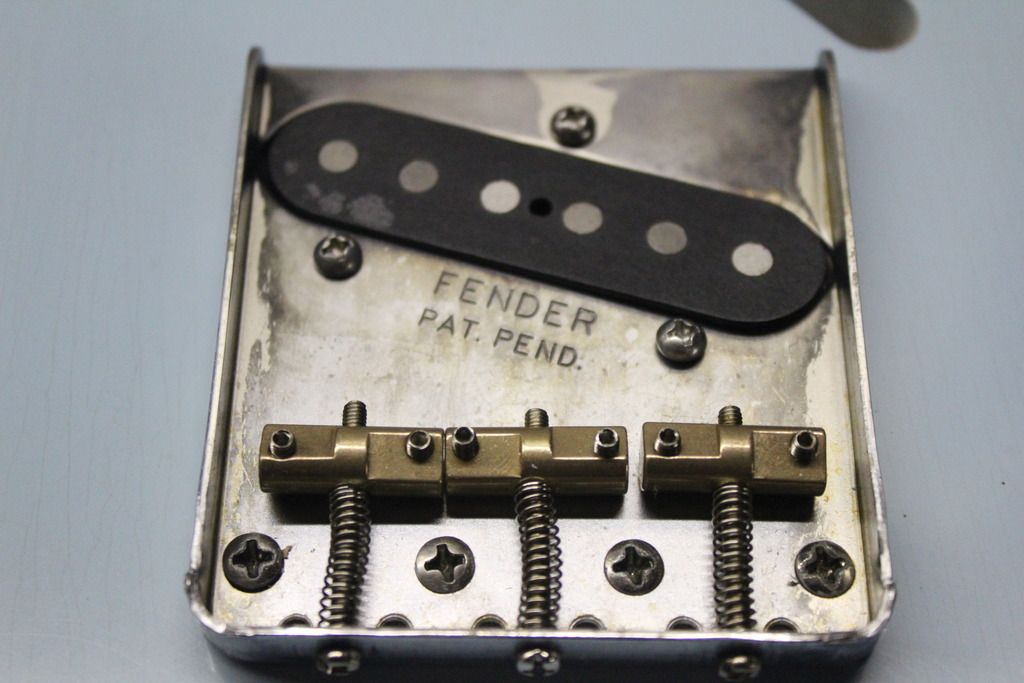
It’s no accident that I’ve decided to go with an Esquire, its pretty much the simplest electric guitar design ever. The jury seems to be out on what the best Esquire pickup is, but I figured I could not go wrong buying from a small company making hand wound pickups. This little gem was another ebay auction I won for what was billed as a “Classic Esquire / Tele Bridge” from Benson Custom.
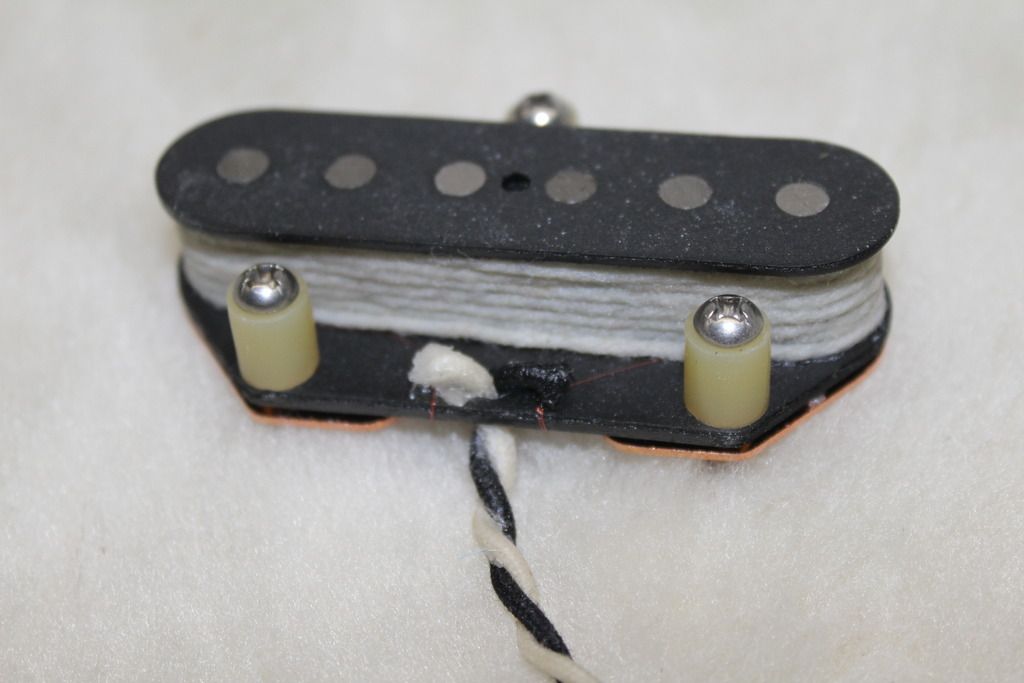
Managed to get it for under $45, on the low end of my price point estimate.
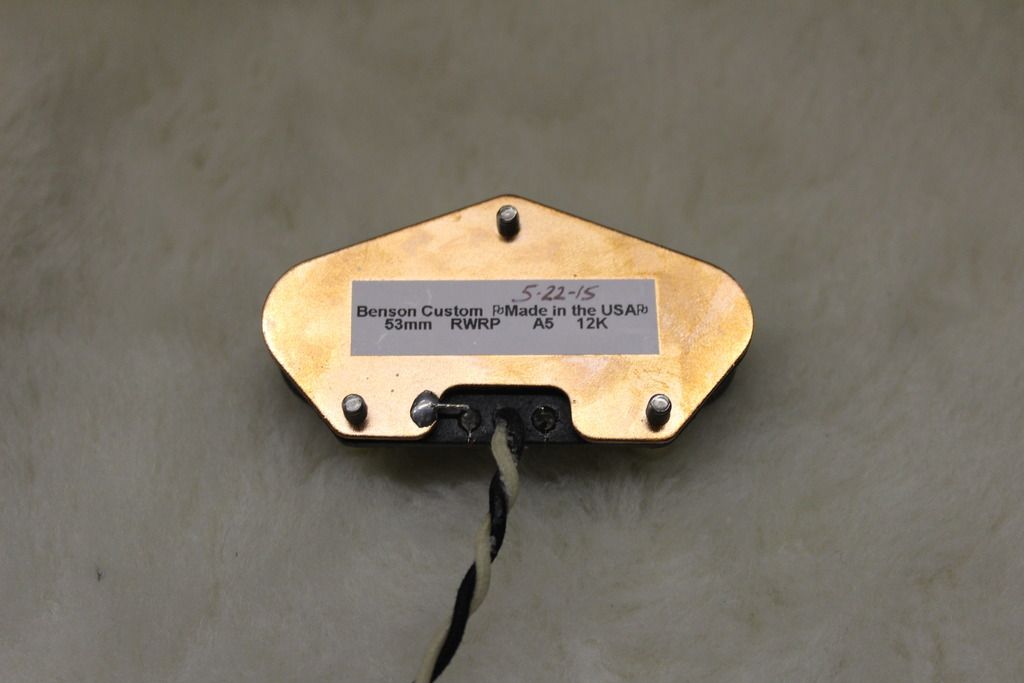
12k!!! I have a slight concern that this guy might be too hot because it has the highest resistance of any pickup I researched, but again, we’ll see once its all wired and strung up.
That's pretty much everything I need to get started. I’ll post updates on my progress, but patience with this process will be key.
Re: Relicaster build
Posted: Sun May 31, 2015 6:58 am
by clipless bumper
Nice write up - cool project!
Looks like you'll end up with a great guitar at a great price. You're approach to the aging/relicing seems perfect.
How are the pre-wired controls set up? Standard Esquire with the way rolled off tone in position 3?
Re: Relicaster build
Posted: Sun May 31, 2015 7:37 am
by RyanDistortion
Super duper thread, Joe brogan! Well written and had me drooling

I have to know how it ends! Keep it up.
Re: Relicaster build
Posted: Sun May 31, 2015 10:12 am
by Beef
Looks awesome, can't wait to see it finished. Esquires for life hommie.

Re: Relicaster build
Posted: Sun May 31, 2015 10:55 am
by Tortuga
Awesome start, Greg! I don't understand all the hatred of relic jobs, as long as they're not overdone - and you seem to be doing this right. Really like the body you picked up, and can't wait to see what you do with this!
Re: Relicaster build
Posted: Sun May 31, 2015 3:24 pm
by itchyfingers
Thanks guys!
Mamberg - Yes the Emerson has the classic Esquire wiring -
1. Volume Only (Tone Pot out of Circuit)
2. Standard Volume & Tone
3. Volume & Fixed 0.0047uf Capacitor (Tone Pot out of Circuit).
I've seen quite a few people going with this "cocked wah" mod, but I hear that the original position 3 gets a great jazz tone, which kinda has me intrigued. Plus, dat Emerson...
Re: Relicaster build
Posted: Sun May 31, 2015 11:14 pm
by itchyfingers
For the pickguard, I went with a classic single ply white 5-hole design. As I mentioned, it wasn't even a close fit for where the PG meets the control plate. I was tempted to use the Dremel, but that could get out of hand quick. I went with an Xacto knife and a few grades of sandpaper. I got a little overzealous in one corner, but its not bad. The plastic pickguard material is still on and is fraying here.
I took off the protective material - it was bright freaking white and needed to be dirtied up a bit to look the part. I like on really old guitars how the pickguard is discolored only on the outside of the strings. I masked off the center where the strings would be and went with progressive coats of shoe polish for the aging. Again, easy to do too much here, but I came out with a nice parchment color for what wasn't masked off.
Re: Relicaster build
Posted: Sun May 31, 2015 11:30 pm
by itchyfingers
For the neck, I am using my US Masters Strat as a guide or template. It has about 25 years of honest actual wear on it, about 10 of which was from yours truly. Its by far the most comfortable neck of any guitar in my stable. I won't be able to get quite so dark on the amber, but its a good goal to shoot for, especially around the edges.
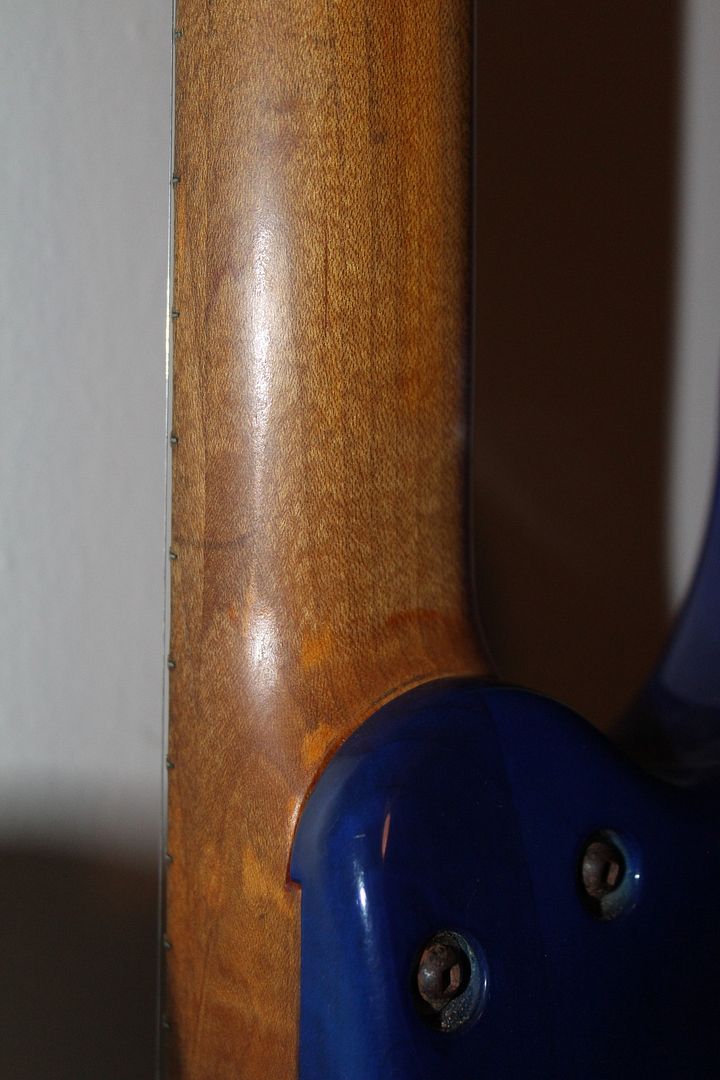
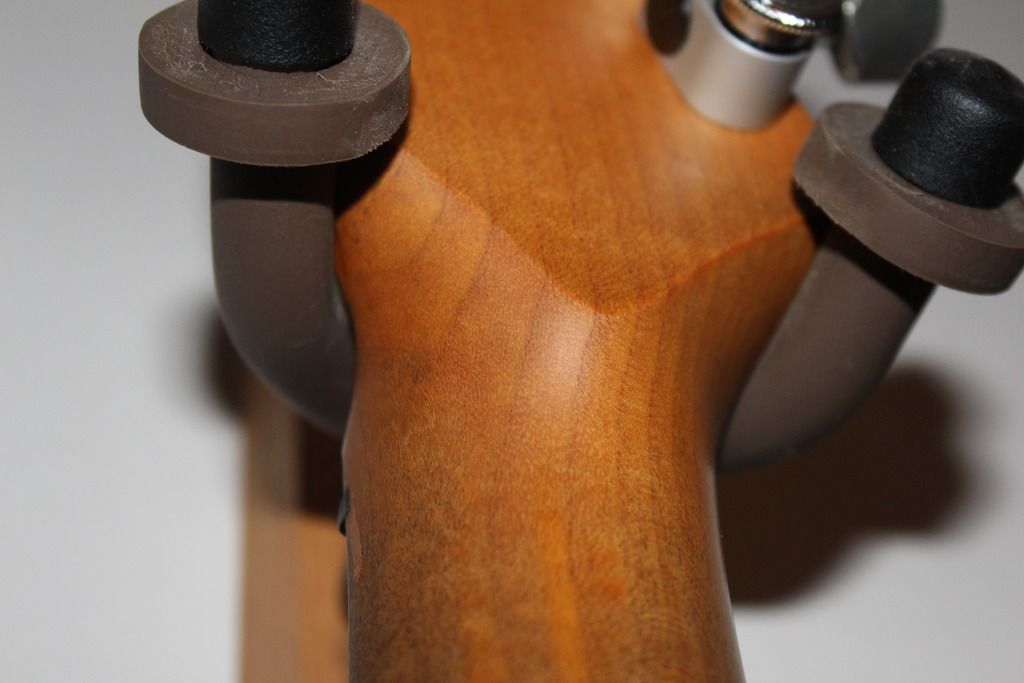
Rather than mucking up the Tele neck right off the bat, I got a bit of practice using an old Squier neck I pulled off my P bass. It came out pretty good, and gave me an idea of what to expect on the Tele neck. My plan was to sand off all the poly on the back, headstock, and sides in sequence, treat them, sand back and treat again, etc. Still not sure what I'm doing with the fretboard. So after sanding with progressively finer grit sandpaper, I hit it with brown shoe polish to get a bit more of that amber hue, and a bit of black to dirty up the area around the skunk stripe. Here you can see the heel which is still glossy from the factory, hasn't been touched, but the back has been sanded and hit with one coat of "stain"
And here's the heel after treatment to match:

Here's a shot of the whole neck, going to let this sit a few days and see how it sets. I think I could go darker with the black.
Re: Relicaster build
Posted: Tue Jun 02, 2015 12:44 pm
by fretless
Awesome ! gonna be real sweet !
Re: Relicaster build
Posted: Tue Jun 02, 2015 12:52 pm
by JerEvil
Dude that is awesome! Can wait to see how it comes out!
Re: Relicaster build
Posted: Thu Jun 04, 2015 11:10 am
by itchyfingers
Got a bit more work done last night. Put a few more coats of "stain" on the back of the neck and also got the waterslide on the headstock - thanks Mamberg! I bought this one off him as a backup when he decided against using it for the US Map Lesquire, and was stoked that I did. The other ones I received looked like they were done freehand!

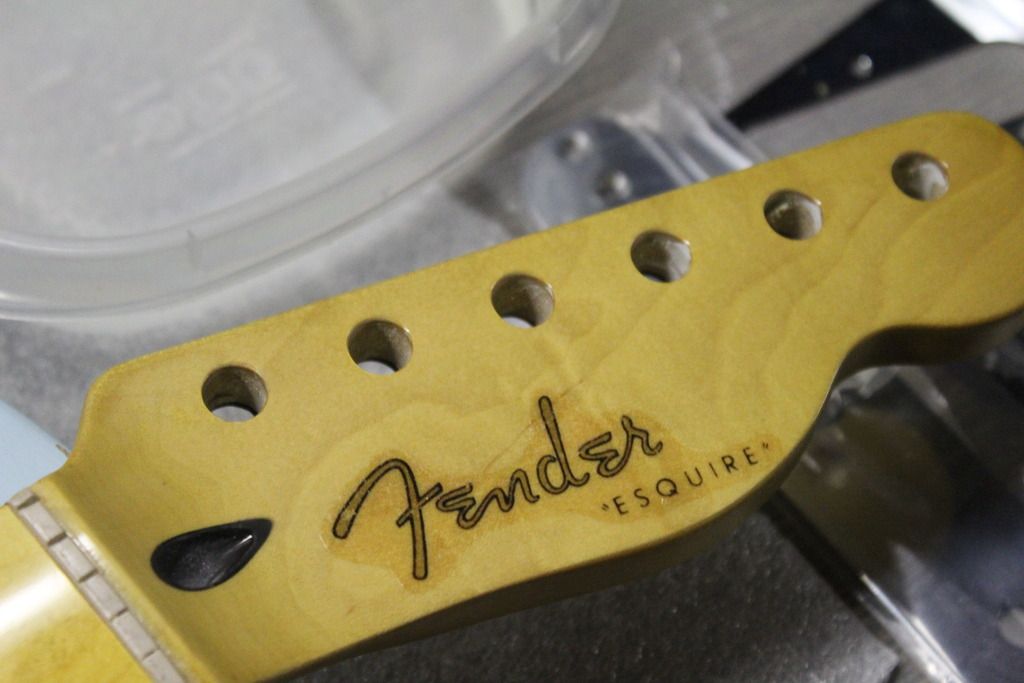
It's got some "rough" or uneven spots, but hey, it's gonna be a relic so who cares! I'll be hitting that with the first of many lacquer mist coats after I get home from band practice this evening.
Re: Relicaster build
Posted: Thu Jun 04, 2015 11:14 am
by clipless bumper
Glad to see it went to good use!!
Has a vintage look to it already.
Re: Relicaster build
Posted: Thu Jun 04, 2015 11:16 am
by itchyfingers
mamberg wrote:Glad to see it went to good use!!
Has a vintage look to it already.
Thanks again man - it looks 10 times better than the others that I received!
Re: Relicaster build
Posted: Thu Jun 04, 2015 11:31 am
by nightflameauto
This is looking pretty awesome. Nice work so far.
Re: Relicaster build
Posted: Sat Jun 06, 2015 3:33 am
by itchyfingers
Got a bit of work done tonight. I began aging metal parts this evening after work. Here is a shot of my time machine:

Oh wait, wrong one. This is my time machine:
Its essentially a shelf over a pool of muriatic acid, using two Ziploc containers. I gotta say, it did not go as I was expecting! I started off with the bridge, bridge screws, and string ferrules. Thinking most of this stuff will be covered or on the back, these would be a good place to start. I filled the big bin with about a half inch of acid, placed the parts on the shelf / small bin, and sealed up the big bin. I checked on the parts every 20 minutes, and continued to do so for two hours. After that entire time, the parts looked identical to when I opened their packaging. I know I said I was going to be patient and not drop the parts directly in the muriatic acid...

Re: Relicaster build
Posted: Sat Jun 06, 2015 3:47 am
by itchyfingers
Re: Relicaster build
Posted: Sat Jun 06, 2015 3:52 am
by itchyfingers
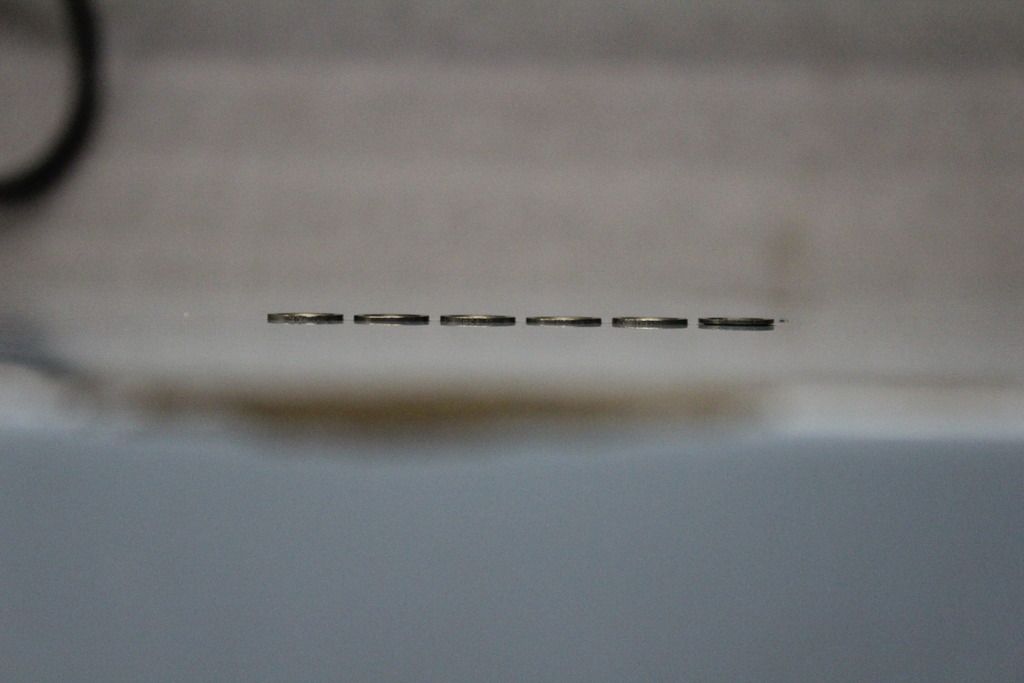
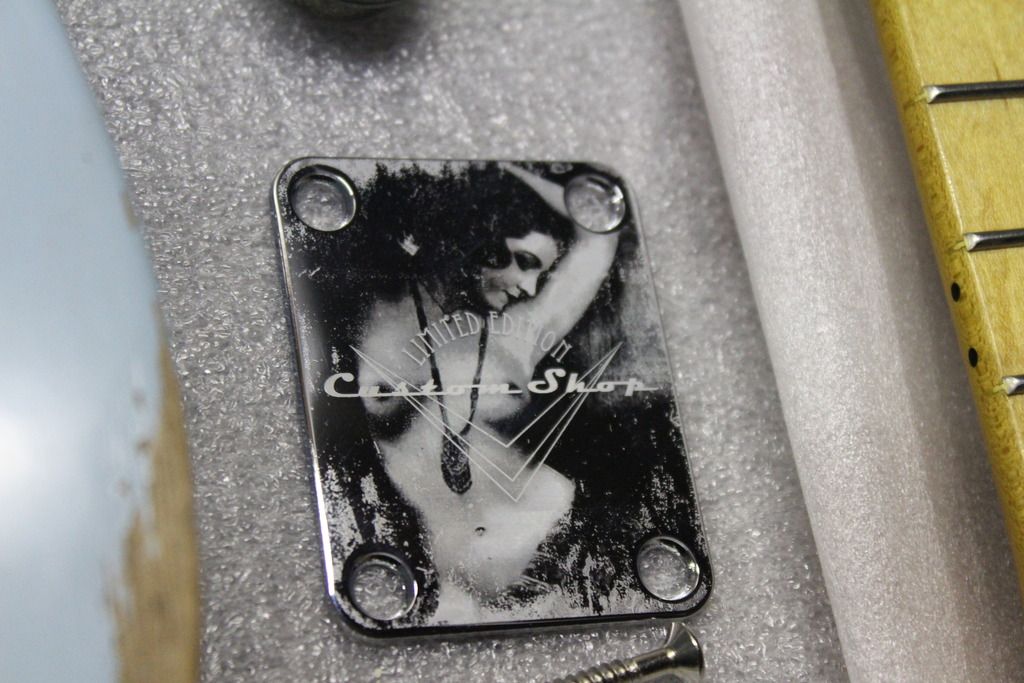
Got the ferrules mounted nice and flush.
Attached the pickup to the bridge and bolted that all down.
This li'l beauty will be holding the neck on, but I need to finish aging the back and drilling the headstock for the tuners first.
Re: Relicaster build
Posted: Sat Jun 06, 2015 9:28 am
by clipless bumper
Looks great!
How did you mount the ferrules? Tap them in, or did you press them in somehow?
Re: Relicaster build
Posted: Sat Jun 06, 2015 10:59 am
by Tortuga
Any chance you'll have this wrapped up by the ampfest, or just bring what you have so far? I'd love to see the parts in person
Re: Relicaster build
Posted: Sat Jun 06, 2015 11:03 am
by ajaxlepinski
You gotta love that neck plate!


