Relicaster build

Post custom amp, guitar and fx mods. Share details about your custom builds.

Moderators: greatmutah, GuitarBilly

User avatar
itchyfingers
Crystal Lettucer
Posts: 10987
Joined: Tue May 28, 2013 1:51 am
Location: Sandy Eggo

Re: Relicaster build

Post by itchyfingers »

Mamberg- I used my thumb to push the ferrules in for the most part. Then I used a rubber mallet to finish them off and make them even.

GS- I think I might have it all put together by the middle of the week, so yeah, I'll bring it to LA.

Ajax - (o)(o) :D
User avatar
itchyfingers
Crystal Lettucer
Posts: 10987
Joined: Tue May 28, 2013 1:51 am
Location: Sandy Eggo

Re: Relicaster build

Post by itchyfingers »

Made a bit more progress today.

I finished the neck up, I think it's about as "dirty" as it's going to get. I masked off the area across the headstock tuner holes and measured the exact center of each hole. This gave me a guideline for where to drill the hole for the tuner's support post. Measured how far from post to support post, also did a "dry fit", and had my marks for where to drill the guide holes.
Image

Measurements came out pretty good, so I opened each hole up with a bigger drill bit.
Image

Dropped the tuners in and while they aren't quite perfect, none of the tuners bump into each other, so its good enough for rock and roll. You can see the far right tuner is a tad crooked, but as long as my OCD doesn't get the best of me, I can live with it.
Image

Image
Last edited by itchyfingers on Fri Jun 12, 2015 10:14 am, edited 3 times in total.
User avatar
itchyfingers
Crystal Lettucer
Posts: 10987
Joined: Tue May 28, 2013 1:51 am
Location: Sandy Eggo

Re: Relicaster build

Post by itchyfingers »

Also finished aging all the metal parts. The control plate was not very cooperative, as the acid just couldn't seem to take hold of the finish - nice work Chinese kids in the metal plant! Not so good for me though. Despite not wanting to physically rough up the metal parts, I pretty much had to with this control plate. I wet sanded it a bit using 1000 grit, then dumped it back in the acid for about 45 minutes. It started eating through to what looks like brass, and I began to see some swirls from the sandpaper, so I pulled it out, washed it and hit it with WD40. I should go back and state that the acid will continue doing its job until the piece is completely dry, even from water. So I started using the WD40 to ensure all the water was gone, then a final wipedown. Went to put the wiring harness in, and it didn't fit the control plate - should have spent the extra $2 on the Fender branded part, lesson learned! This thing has given me grief a few times. Ended up having to desolder a few things to get everything to fit, but got it together.
Image

I managed to get everything to fit and be able to drop it into the body, so I can't really complain.
Image

Hardware added, and control plate mounted. Looks pretty good with the bridge and aged knobs.
Image

Not so much with the ashtray, which I completely overdid!
Image

Here's the input jack as well.
Image
clipless bumper
clipless
Posts: 20317
Joined: Sat Jan 19, 2013 10:06 am
Location: 20 miles outside of Philly

Re: Relicaster build

Post by clipless bumper »

That all looks awesome man!!
Pieces wouldn't all age identically anyway - nothing wrong with any of it that I can see.
User avatar
Tortuga
Crystal Lettucer
Posts: 17174
Joined: Sat Jan 19, 2013 11:29 am
Location: Slow and steady, bruh

Re: Relicaster build

Post by Tortuga »

If it were me, I'd just ditch the ashtray. Looking good, regardless! Really like wiring harness you got.
Co-founder of the Jet Setters 2.0 (Jet ★ City Lounge Redux)

Gear
  • CEOwLP (Sig T), Carvin DC135, Westone Spectrum SX (guitar) & GT (bass), Squier strat
  • '66 Bassman, '61 Magnatone, Mark III, 1960AX, homebrew 2x12 (C90 / EVM12L Thiele), HX Stomp, JCA50H
  • PLX GABion, SD-1, TS9, Crybaby, MXR108, Algal clone, Carbon Copy deluxe

DIY

Ostinato Rubato wrote:"That's the second boomery bro on this forum I've helped seduce to the greenside." :evil:

"Slow and steady gets to **** again eventually" :fap:
User avatar
Beef
Hall of Fame Member
Posts: 3625
Joined: Wed Apr 17, 2013 1:53 pm

Re: Relicaster build

Post by Beef »

Looking gorgeous! I fuckin love Esquires. :fap:
Wu-Tang is for the children.
User avatar
itchyfingers
Crystal Lettucer
Posts: 10987
Joined: Tue May 28, 2013 1:51 am
Location: Sandy Eggo

Re: Relicaster build

Post by itchyfingers »

Beef wrote:Looking gorgeous! I fuckin love Esquires. :fap:


Beef, post a pic of your Esquire, I need some inspiration for the home stretch!
User avatar
itchyfingers
Crystal Lettucer
Posts: 10987
Joined: Tue May 28, 2013 1:51 am
Location: Sandy Eggo

Re: Relicaster build

Post by itchyfingers »

Finished up the back of the neck over the weekend, and I'm fairly pleased about how the aging process ended up. I had done a final acrylic coat on Saturday, so I came back in with some 1000 grit sandpaper, more shoe polish for stain, and then a final waxing. It came out great, especially around the edges - need to get some better pics of that to post here. I will need to do something about the fretboard though. You can sorta see how the headstock is darker than the original shade on the front of the neck.
Image

It's beginning to look like a guitar! I re-mounted the tuners and got the neck attached to the body. Pretty stoked that the neck pocket was cut correctly and I only needed to drill the neck once! Not a huge surprise, but the pickguard doesn't quite fit. I will need to hit it with some sandpaper where it meets the neck, and possibly more work on where it meets the control plate. Once that's settled, I can drill the PG holes in the body.
Image

I was hoping the short post height on these tuners would be sufficient enough of a break angle for the top two strings, but I may still need to add a string tree. I'll have to see how it breaks in, whether the tuning stability is good enough and if the string actually stays in in the nut. I'd kinda prefer no string tree, as it currently looks really clean without it, but if it needs it to be functional, then it will get one.
Image

I'm contemplating doing some finger-finish-wear down a majority of the fretboard. Thinking I will use acetone to reproduce the finish wear spots, fill those spots with black shoe polish. Then progressive sanding (600-800-1000 grit) over the top of each fret position, hit that with brown shoe polish. Then nitro over the whole front. That should give the worn look to the front of the neck, and match up the color with the backside.
Last edited by itchyfingers on Mon Feb 15, 2016 1:43 pm, edited 1 time in total.
User avatar
Beef
Hall of Fame Member
Posts: 3625
Joined: Wed Apr 17, 2013 1:53 pm

Re: Relicaster build

Post by Beef »

itchyfingers wrote:
Beef wrote:Looking gorgeous! I fuckin love Esquires. :fap:


Beef, post a pic of your Esquire, I need some inspiration for the home stretch!


I'm on mobile right now but I'll throw one up when I get home this afternoon. :thu:
Wu-Tang is for the children.
User avatar
JerEvil
Crystal Lettucer
Posts: 18252
Joined: Fri Jan 18, 2013 4:36 pm

Re: Relicaster build

Post by JerEvil »

Looks killer!
_____________________________________________________

I have some gear and junk...

Like Coffee? Like Pedals and amps? Like General Jackassery???

Check out "Dunky's N' Demos at:

https://dunkysndemos.com
https://www.youtube.com/c/JeremyVarao
User avatar
Beef
Hall of Fame Member
Posts: 3625
Joined: Wed Apr 17, 2013 1:53 pm

Re: Relicaster build

Post by Beef »

Latest pics looking awesome. Here's a shitty picture of my parts-Esquire. Currently got a Bareknuckle Flat '50 in it right now, great pickup.

Image
Wu-Tang is for the children.
User avatar
itchyfingers
Crystal Lettucer
Posts: 10987
Joined: Tue May 28, 2013 1:51 am
Location: Sandy Eggo

Re: Relicaster build

Post by itchyfingers »

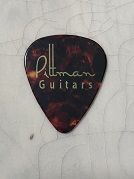
Beef wrote:Latest pics looking awesome. Here's a shitty picture of my parts-Esquire. Currently got a Bareknuckle Flat '50 in it right now, great pickup.

Image


Looks awesome Beef! Can't go wrong with the butterscotch / black combo...
Image
User avatar
Beef
Hall of Fame Member
Posts: 3625
Joined: Wed Apr 17, 2013 1:53 pm

Re: Relicaster build

Post by Beef »

Thanks! Yeah, it's such a classic combo. And you can't see so well in my shitty picture but some of the grain comes through, it looks real nice. (And you might consider flipping the control plate on yours. I love having the volume knob closer for swells and I also ride it pretty hard to control gain)
Wu-Tang is for the children.
User avatar
itchyfingers
Crystal Lettucer
Posts: 10987
Joined: Tue May 28, 2013 1:51 am
Location: Sandy Eggo

Re: Relicaster build

Post by itchyfingers »

Beef wrote:Thanks! Yeah, it's such a classic combo. And you can't see so well in my shitty picture but some of the grain comes through, it looks real nice. (And you might consider flipping the control plate on yours. I love having the volume knob closer for swells and I also ride it pretty hard to control gain)


Oh, I definitely considered it! I have it flipped on my Baja right now, but I'm considering going putting that back to standard. Something about how I strum, but I seem to bump the volume knob far too easily when its up front; if the switch is up there, I may still run into it, but not enough to switch pickup selections. :idk:
RyanDistortion
Hall of Fame Member
Posts: 7891
Joined: Tue Apr 02, 2013 5:51 pm
Location: Long Island, NY

Re: Relicaster build

Post by RyanDistortion »

Sexy as fuuuu, bro. If you did this to a surf green tele, I could actually stand it :lol:
User avatar
itchyfingers
Crystal Lettucer
Posts: 10987
Joined: Tue May 28, 2013 1:51 am
Location: Sandy Eggo

Re: Relicaster build

Post by itchyfingers »

Thanks Arab!

Ryan, maybe next time around!
User avatar
itchyfingers
Crystal Lettucer
Posts: 10987
Joined: Tue May 28, 2013 1:51 am
Location: Sandy Eggo

Re: Relicaster build

Post by itchyfingers »

Here are a couple more views of the aged neck.
Image
Image

After a fair amount of sanding, I got the pickguard in pretty snug. I used an Xacto knife to mark my drill points and made my pilot holes for the screws. After all the work put in on this, it was satisfying to see it working finally.
Image
Image

As I mentioned above, because the fretboard was so much brighter, I decided I had to age the front somewhat. Again, I used the US Masters Strat as a guide.
Image

I didn't want to simulate quite as much wear, but the general idea was to introduce some grey wear between certain strings on certain fret positions. So I went through the first two frets and tried to simulate the wear. I tried using acetone to remove the finish, but it wasn't strong enough to cut through the poly. So I decided to remove the neck and sand it off. Unfortunately at this point I found the downside to aging metal parts - they weaken! One of the neck screws snapped in half when I was removing them. I considered leaving it put, but the thought of masking off the body for the rest of the work, or having 3/4 holding power on the neck made me decide to remove it. WIth some work, I got it separated from the body and then removed the busted screw using some vice grips. After sanding down the fretboard, I remounted the neck with some new screws, restrung, and used black shoe polish to simulate the wear.
Image

I'm going to leave it on overnight so it really soaks in, buff it out / go over it with a quick coat of brown, and then I'll be ready to cover with nitro.
User avatar
Tortuga
Crystal Lettucer
Posts: 17174
Joined: Sat Jan 19, 2013 11:29 am
Location: Slow and steady, bruh

Re: Relicaster build

Post by Tortuga »

Whoa - you're not fucking around at all... good luck!
Co-founder of the Jet Setters 2.0 (Jet ★ City Lounge Redux)

Gear
  • CEOwLP (Sig T), Carvin DC135, Westone Spectrum SX (guitar) & GT (bass), Squier strat
  • '66 Bassman, '61 Magnatone, Mark III, 1960AX, homebrew 2x12 (C90 / EVM12L Thiele), HX Stomp, JCA50H
  • PLX GABion, SD-1, TS9, Crybaby, MXR108, Algal clone, Carbon Copy deluxe

DIY

Ostinato Rubato wrote:"That's the second boomery bro on this forum I've helped seduce to the greenside." :evil:

"Slow and steady gets to **** again eventually" :fap:
RyanDistortion
Hall of Fame Member
Posts: 7891
Joined: Tue Apr 02, 2013 5:51 pm
Location: Long Island, NY

Re: Relicaster build

Post by RyanDistortion »

Itchyfingers needs to scratch his itches. Much respect on level of effort. Super fapable.
User avatar
itchyfingers
Crystal Lettucer
Posts: 10987
Joined: Tue May 28, 2013 1:51 am
Location: Sandy Eggo

Re: Relicaster build

Post by itchyfingers »

OK, so bad news. Apparently, nitro will chemically eat thru pretty much anything on its way to the wood. I had been doing a sequence of sand-wax-stain-acrylic, then repeating that over and over. It was working well, giving me a few different layers of maple / amber / brown / grey. The fretboard had nice even little wear marks up the neck. Should have taken a photo…

Because when I applied the nitro, everything went to shit. I knew the deal with nitro was that you just want one continuous stroke because it sets up quick and going back over it will leave unwanted brush marks. Even with a super light coat, it just smeared everything into a poop colored mess. Good thing I only tried it on the neck and left the headstock alone! :clap:

So at this point I had to decide whether to press on with more coats of nitro or sand it out and abandon the nitro idea entirely. I went with the latter because adding more layers of nitro would only seal in the goopy mixture I'd just created. Plus, I want to take this guy to the ampfest this weekend and I'll need a couple days to get the neck to settle in for a quick, basic setup. I figure I can always come back, sand it down and try something new. So I sanded down the back of the neck to a smooth feel at 1000 grit and decided its going to stay like this for a little while as I put some honest wear on it.
Image

It didn't turn out too bad, just not what I originally had in mind, and not as cool as it looked right before I smeared it into a mess. The fretboard still got a bit dirtied up, and I really like how the headstock turned out, so mission accomplished somewhat. Eventually I think I'll sand down the whole thing and go straight nitro, but for now its mounted back on the body.
Image

Strap buttons mounted, tuners re-installed, strung back up, and she's ready for a sound check!
Image
Last edited by itchyfingers on Fri Jun 12, 2015 9:58 am, edited 1 time in total.
User avatar
itchyfingers
Crystal Lettucer
Posts: 10987
Joined: Tue May 28, 2013 1:51 am
Location: Sandy Eggo

Re: Relicaster build

Post by itchyfingers »

I plugged in and was mildly disappointed when I only got sound out of one pickup selector position. I say mildly because the tone I got from the lone audible setting was pretty sweet! I opened up the hood and tried moving the pickup's white lead to different spots on the switch. I found one that got sound in all three positions, so I went with it. "Neck" position is volume, no tone; a bit dark for a Tele, but I dig it. "Middle" position is volume and tone; very similar to a typical Tele bridge, but more open sounding and bloomy, will be using this a ton. "Bridge" position is supposed to be volume and fixed tone via a cap, but the tone knob is still working and I am honestly having a hard time being able to tell the difference in these last two positions. I'll have to drop an email to Emerson and see what I did wrong.

Image

I made a couple 1/4 turns on the truss rod tonight and tried to eyeball the radius of the bridge saddles. I'll see how it's looking tomorrow and set the correct string height and get the intonation squared away. After just riffing on it a bit while making tweaks, I am super pleased with how it feels and sounds. It's a bit lighter than my Baja, and hence a tad more comfortable. The whole thing was definitely a learning experience, and I have a ton more respect for those guys at the custom shop whose job it is to relic instruments. Turns out its not as easy as lighting it on fire or dragging it behind a truck… :D
clipless bumper
clipless
Posts: 20317
Joined: Sat Jan 19, 2013 10:06 am
Location: 20 miles outside of Philly

Re: Relicaster build

Post by clipless bumper »

itchyfingers wrote:I plugged in and was mildly disappointed when I only got sound out of one pickup selector position. I say mildly because the tone I got from the lone audible setting was pretty sweet! I opened up the hood and tried moving the pickup's white lead to different spots on the switch. I found one that got sound in all three positions, so I went with it. "Neck" position is volume, no tone; a bit dark for a Tele, but I dig it. "Middle" position is volume and tone; very similar to a typical Tele bridge, but more open sounding and bloomy, will be using this a ton. "Bridge" position is supposed to be volume and fixed tone via a cap, but the tone knob is still working and I am honestly having a hard time being able to tell the difference in these last two positions. .........


Sounds like this position is the volume and fixed tone - the volume alone shouldn't make it sound any darker. There are 30 or more diagrams for telecaster wiring here:
https://sites.google.com/site/phostenixwiringdiagrams/teles/2-pickup-teles
It's pretty easy to get the two different sides of the switch confused - one is opposite to the other in terms of which terminals are connected in which position.

You can look at the switch and determine which is which pretty easily - maybe follow the paths through on the drawing compared to the actual wiring - and you should be able to figure it out.

And the neck looks pretty good to me - I like the uneven wear around the heel.
User avatar
Tortuga
Crystal Lettucer
Posts: 17174
Joined: Sat Jan 19, 2013 11:29 am
Location: Slow and steady, bruh

Re: Relicaster build

Post by Tortuga »

Sorry to hear about the finishing woes, but the whole thing looks good, man. Is there a pic of the fretboard wear?
Co-founder of the Jet Setters 2.0 (Jet ★ City Lounge Redux)

Gear
  • CEOwLP (Sig T), Carvin DC135, Westone Spectrum SX (guitar) & GT (bass), Squier strat
  • '66 Bassman, '61 Magnatone, Mark III, 1960AX, homebrew 2x12 (C90 / EVM12L Thiele), HX Stomp, JCA50H
  • PLX GABion, SD-1, TS9, Crybaby, MXR108, Algal clone, Carbon Copy deluxe

DIY

Ostinato Rubato wrote:"That's the second boomery bro on this forum I've helped seduce to the greenside." :evil:

"Slow and steady gets to **** again eventually" :fap:
User avatar
Beef
Hall of Fame Member
Posts: 3625
Joined: Wed Apr 17, 2013 1:53 pm

Re: Relicaster build

Post by Beef »

Bummer about the difficulties but from all the pictures you posted it still looks real nice. And it's all a learning experience so hopefully you can use everything to make it easier on your next go around. Definitely double check the wiring, no tone knob should be a tad brighter in my experience.
Wu-Tang is for the children.
User avatar
itchyfingers
Crystal Lettucer
Posts: 10987
Joined: Tue May 28, 2013 1:51 am
Location: Sandy Eggo

Re: Relicaster build

Post by itchyfingers »

mamberg wrote:
itchyfingers wrote:I plugged in and was mildly disappointed when I only got sound out of one pickup selector position. I say mildly because the tone I got from the lone audible setting was pretty sweet! I opened up the hood and tried moving the pickup's white lead to different spots on the switch. I found one that got sound in all three positions, so I went with it. "Neck" position is volume, no tone; a bit dark for a Tele, but I dig it. "Middle" position is volume and tone; very similar to a typical Tele bridge, but more open sounding and bloomy, will be using this a ton. "Bridge" position is supposed to be volume and fixed tone via a cap, but the tone knob is still working and I am honestly having a hard time being able to tell the difference in these last two positions. .........


Sounds like this position is the volume and fixed tone - the volume alone shouldn't make it sound any darker. There are 30 or more diagrams for telecaster wiring here:
https://sites.google.com/site/phostenixwiringdiagrams/teles/2-pickup-teles
It's pretty easy to get the two different sides of the switch confused - one is opposite to the other in terms of which terminals are connected in which position.

You can look at the switch and determine which is which pretty easily - maybe follow the paths through on the drawing compared to the actual wiring - and you should be able to figure it out.

And the neck looks pretty good to me - I like the uneven wear around the heel.


Thanks Mamberg! That link proved useful - I have the "Simplified Eldred Mod", and from the looks of it, I wired the pickup correctly. One thing I don't have is a ground wire, thinking this could be my issue perhaps. Could also be I soldered something in the wrong place or knocked a joint loose when I was rearranging to get everything to drop into the body. I'll check on it tonight, thanks again, bud.
Post Reply